

How to Replace Missing Threaded Spindle Rods on a Pressure Gate
Do not use a pressure-mounted gate while spindle rods or other required mounting parts are missing. To replace baby gate spindle rods safely, first confirm the exact gate model and its approved installation location, then install only compatible hardware and complete every check in the gate manufacturer's manual. Original manufacturer replacement hardware is preferred when available.
A pressure gate works as a complete system. Its threaded sockets, rods, adjustment wheels, contact pads, wall cups, pressure indicators, latch, frame, and mounting surfaces all matter. Child-safety accessories support active adult supervision. They do not replace it.
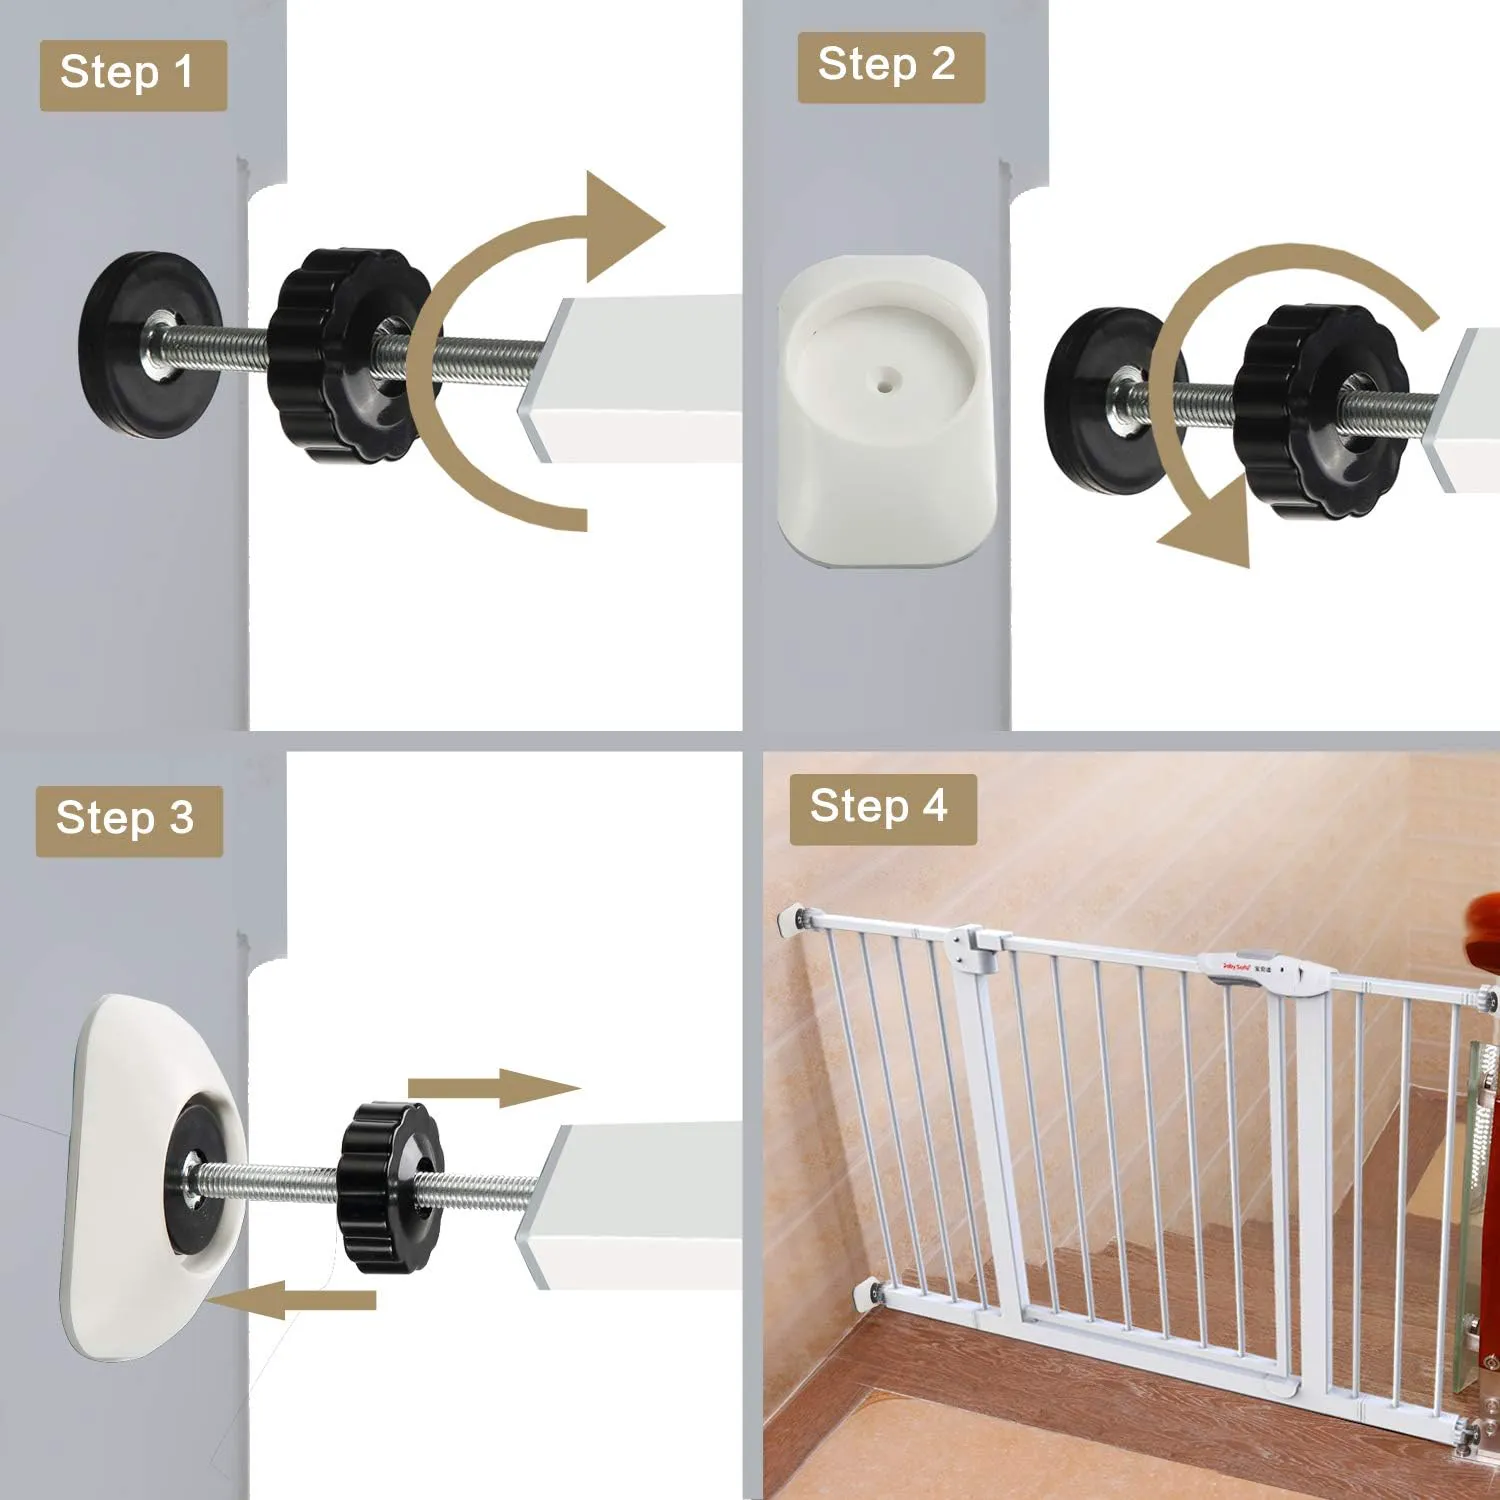
Before You Replace Baby Gate Spindle Rods
Start by finding the gate's brand, model number, and manual. Check the frame label, packaging, purchase record, or manufacturer support materials. The manual controls where the gate may be installed, whether it requires wall cups, and how its pressure or movement checks work.
Confirm the opening is a permitted location for that gate. Do not assume a pressure-mounted gate is suitable at a stair opening because it appears to fit. A replacement rod or wall cup does not change the manufacturer's location rules.
Next, inventory every required component. Inspect all four threaded spindle rods, baby gate adjustment wheels, baby gate contact pads, wall cups, and any manufacturer-specific pressure indicators. Also examine the frame, threaded sockets, hinges, latch, and the wall, trim, or doorway surfaces where the gate will press.
Keep the gate out of service if any component is bent, cracked, corroded, stripped, split, or visibly damaged. Replacement gate tension rods cannot repair a damaged frame, hinge, latch, threaded socket, or mounting surface.
How To Replace Baby Gate Spindle Rods With Compatible Parts
A rod that appears to fit is not necessarily compatible. Compare a replacement against an original rod or the manual specification before installation.
| Fit factor | What to verify |
|---|---|
| Thread diameter | The outside diameter of the threaded shaft |
| Thread pitch | The spacing between thread peaks |
| Total length | The full rod length from end to end |
| Threaded length | The usable threaded section available for adjustment |
| Contact pad | Its size, shape, and fit with the approved contact surface or cup |
| Adjustment wheel | Clearance to turn without contacting the gate frame |
| Extension range | The adjustment limits stated by the gate manufacturer |
An M8 baby gate spindle rod has a nominal 8 mm thread diameter. That is only one measurement. M8 does not prove the thread pitch, overall length, threaded length, contact-pad shape, wheel clearance, permitted extension, or manufacturer approval will match your gate.
For a gate whose original hardware and manual confirm an M8 replacement is appropriate, the Vmaisi 8 mm Baby Gate Threaded Spindle Rod Replacement Hardware Parts Kit includes four approximately 12 cm, or 4.8-inch, replacement assemblies with metal threaded shafts, plastic adjustment wheels, and wall-contact pads. It is an accessory for compatible pressure-mounted gates, not a complete gate or a universal replacement part.
If you cannot confirm every fit factor, contact the gate manufacturer for the correct pressure gate replacement parts. Do not rely on "M8" alone.
Install Replacement Baby Gate Spindle Rods In Order
Measure the clear opening according to the gate manual. If the gate requires wall cups, include their thickness in the measurement because cups change the distance between the gate frame and the contact surface. Wall cups are not major width extenders and should not be used to make an undersized gate reach.
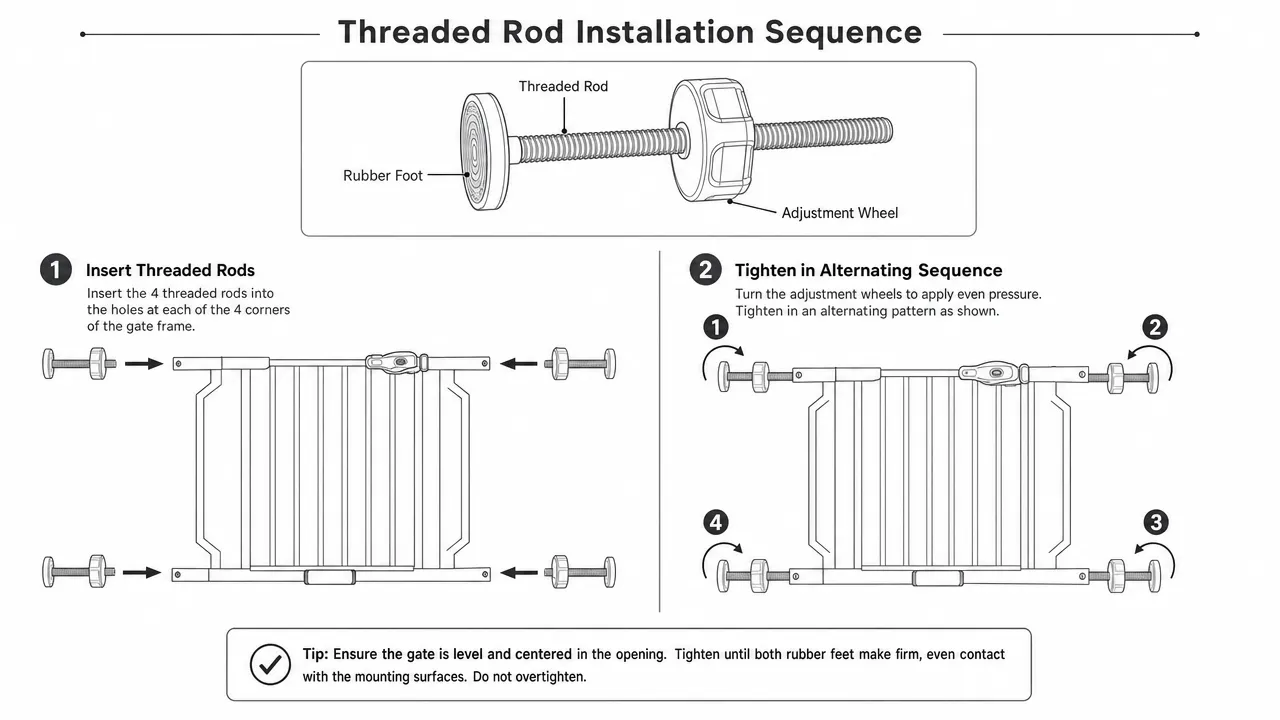
Follow this careful sequence:
-
Inspect the frame and threaded sockets. They should be clean and free from visible damage. Do not proceed if a socket is stripped, cracked, or deformed.
-
Hand-thread each confirmed-compatible rod. Begin straight and turn only by hand at first. Stop if it resists immediately, sits crooked, or will not engage smoothly. Forcing a rod can damage the threads or hide a mismatch.
-
Place the gate in the approved opening and center it as the manual directs. Keep the frame vertical.
-
Adjust the four contact points gradually. Move between corners rather than fully tightening one corner first. This helps maintain balanced pressure and reduces the chance of twisting or bowing the frame.
-
Preserve adequate thread engagement and remain within the adjustment range stated in the manual. Do not guess a safe minimum engagement depth or back the rods out farther than the manufacturer permits.
-
Confirm the contact pads sit squarely against the approved mounting surfaces or required wall cups. If your manual calls for cups, use that system as instructed. For compatible setups, you can review wall cups for pressure-mounted gates, but third-party cups do not replace model-specific installation requirements.
-
Align and close the latch. A pressure gate will not latch correctly if the frame is leaning, distorted, or unevenly adjusted.
Do not tighten until the frame visibly bows or twists. If the latch will not align, loosen the gate, reassess the placement and hardware, and return to the manual rather than applying more pressure.
Test Replaced Baby Gate Spindle Rods Before Use
After you replace baby gate spindle rods, complete the gate manufacturer's full installation procedure. That includes its specified latch check, pressure indicator check, controlled push check, and movement check. Some pressure-mounted gate designs rely on wall cups, while others use visual side-pressure indicators. Follow the system designed for your exact model.
Test from several practical positions within the manufacturer's instructions. Check that the gate remains level, the latch closes and opens as intended, and all four pressure points stay seated. Do not invent a force target or use a forceful test outside the manual's method.
Keep the gate out of service if it moves, slips, becomes unlevel, loses latch alignment, displays a warning indicator, or cannot pass the required checks.
During the first few days, recheck the pressure points, latch, frame alignment, and mounting surfaces. Repeat those checks after an impact, removal, relocation, or a change to the wall, trim, floor, or cup setup. For a broader refresher on placement and everyday use, review these baby gate installation do's and don'ts.

Avoid Shortcuts When You Replace Baby Gate Spindle Rods
Several common fixes can create a setup that looks finished but has not been confirmed as compatible:
- Do not substitute generic bolts for threaded spindle rods. Matching diameter alone does not match pitch, adjustment range, wheel interface, or pad interface.
- Do not use furniture feet, improvised pads, stacked pads, or taped spacers as baby gate wall-contact pads.
- Do not mix incompatible rod lengths unless the exact manual specifies that arrangement.
- Do not force a rod into a threaded socket.
- Do not use wall cups as a way to create a much wider approved opening.
- Do not overtighten enough to distort the frame.
- Do not attempt to compensate for a damaged hinge, latch, frame, socket, or weak mounting surface with baby gate replacement hardware.
If the manual is unavailable, the model cannot be identified, an original rod is not available for comparison, or the gate fails any required check, contact the gate manufacturer and leave the gate out of service. A correctly selected accessory can restore compatible pressure points, but it cannot certify another manufacturer's gate or guarantee suitability in an unapproved location.